
Excavation of mother-of-pearl using hydrochloric acid


- Details
- Kategorie: English articles
- Veröffentlicht: Mittwoch, 21. August 2013 23:57
- Geschrieben von Thomas Magiera (translated into English by Thomas Billert)
- Zugriffe: 17074
![]() Dieser Artikel ist auch in deutscher Sprache verfügbar. Jetzt zur deutschsprachigen Version wechseln.
Dieser Artikel ist auch in deutscher Sprache verfügbar. Jetzt zur deutschsprachigen Version wechseln.
In the Steinkern forum, we frequently came across the question, how to excavate the beautiful layer of mother-of-pearl from gastropod housings or other fossils. I would like to demonstrate this here using recent ear shells. More information about these - also called Abalone, ormer or venus’ ears – is available in Wikipedia: http://en.wikipedia.org/wiki/Abalone
These gastropods feature a shell that is rich in mother-of-pearl and are therefore perfect targets for this preparation method. I only prepared smaller specimens, since the chalk layer to be removed can be quite thick for large ones. In these cases, I would recommend to abrade the chalk using sand paper or rotating tools such as a Dremel device, reducing it to an equally thin layer. Be careful – since the preparation result cannot be predicted, try this technique first with bad or dispensable pieces.
When working with hydrochloric acid, make sure you follow the security advice! Please see
http://www.steinkern.de/forum/viewtopic.php?t=1989
I used the following material:
- Hydrochloric acid (30%). A few pipette fillings per piece are sufficient.
- An old plastic bowl
- A pipette
- A petri dish
- Acid-resistant gloves
- A water hose within reach, in case drops of acid are spilled
See below for my setup. The bowl’s bottom should be slightly tilted, which can be achieved using a small chock. This way, excess of acid will run to the bowl’s deepest point, so the shell’s bottom is not exposed to acid and won’t be dissolved.

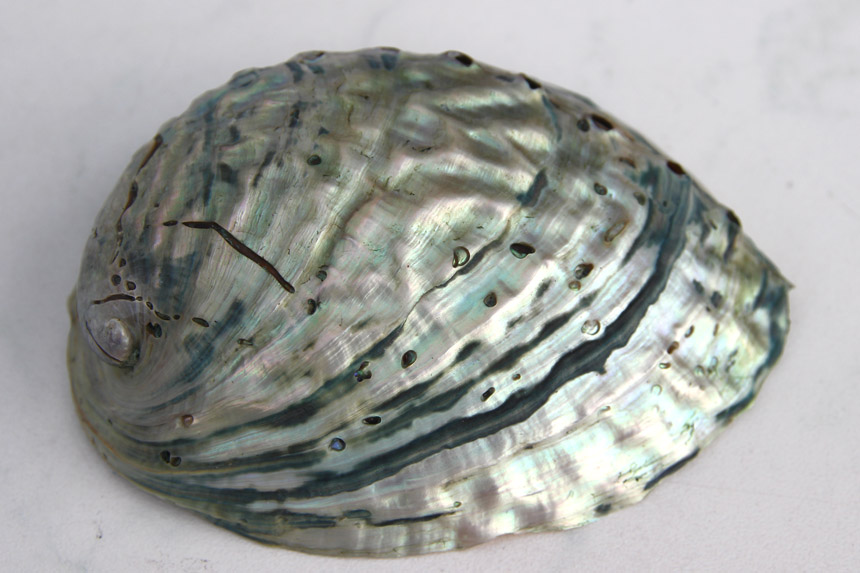
The gastropod’s shell before preparation. The chalk layer is not too thick. There is already some mother-of-pearl visible at its top.

Even without preparation, the shell’s bottom looks amazing. To preserve this, the shell may not be exposed to acid.

In the beginning, soak the entire surface with acid. One or two pipette fillings are sufficient. Let the acid react for a few minutes, flush with water and evaluate the progress. You may prolong reaction time depending on the result. The petri dish under the shell lets the acid run off slowly, so the shell’s bottom is not permanently exposed to acid. Of course, you can use any other acid-resistant object with similar height.

When the first parts of the mother-of-pearl layer are excavated, apply acid selectively to the remaining spots of chalk. Acid that has flown off to the bowl’s deepest point can repeatedly be taken up by pipette and be re-used in a directed manner, just like using a pen. This way, you will only use a very small amount of hydrochloric acid.

This is the result after approx. 30 minutes of etching:
Here are some more examples. To keep the result natural, I abstain from removal of the last remains of chalk or even application of lacquer, as often seen on commercially offered pieces.


I have applied this technique only for a few “showpieces” and would not recommend to generally use it. Many bivalves and gastropods – also the fossil ones – are nicer with their natural shell of chalk. However, in the end this is a matter of your taste.
Thomas Magiera
English translation by Thomas Billert.

